


 Licensed
 All Dubai
 Plumbing Guides
How to Replace a Shower Curb: Step-by-Step Guide
 Mark Reynolds
 Oct 18, 2026
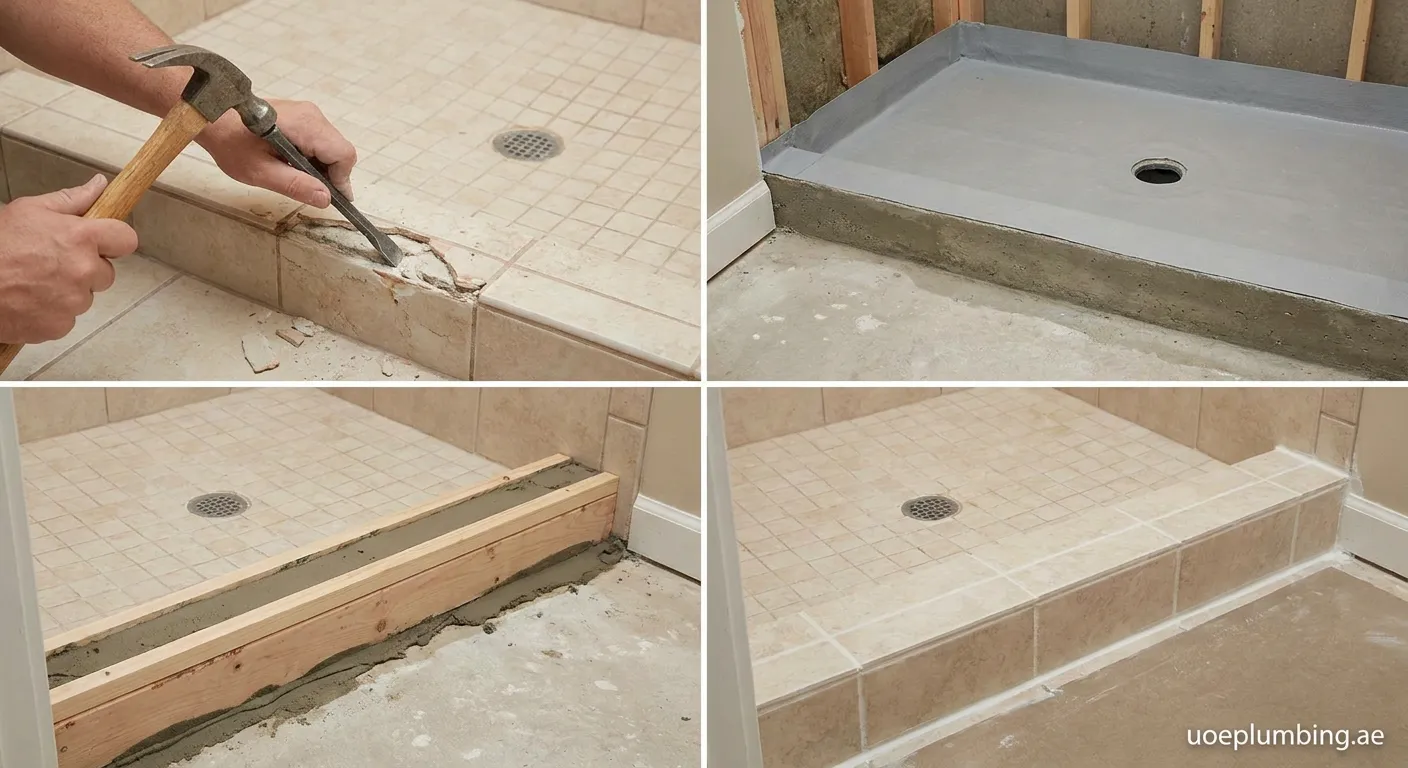
A damaged threshold can cause serious bathroom leaks. Learning how to replace a shower curb ensures your shower stays waterproof, durable, and stylish for years to come.
Understanding Shower Curb Replacement
A shower curb acts as a vital barrier preventing water from escaping the wet area. Over time, moisture penetration, cracked grout, or wood rot can compromise its structural integrity. Knowing how to replace a shower curb correctly is essential for preventing structural rot underneath your bathroom floor.
Essential Tools and Materials
Before starting the project, gather the proper tools to ensure seamless execution:
- Demolition tools: Hammer, chisel, pry bar, and oscillating multi-tool
- Waterproofing supplies: Shower pan membrane, waterproofing liquid or membrane corners, and polyurethane sealant
- Building materials: Pre-formed curb foam or pressure-treated 2x4 lumber, cement backer board, and galvanized screws
- Tiling tools: Thin-set mortar, trowel, tile spacers, replacement tiles, and waterproof grout
Step 1: Demolition and Area Preparation
The first phase of how to replace a shower curb involves safely removing the old structure. Carefully score and cut the grout lines around the curb to prevent damaging adjacent wall and floor tiles. Use a hammer and chisel to pop off existing tiles. Once tiles are cleared, unfasten damaged cement board and remove rotted wood or degraded core material. Inspect the exposed subfloor and shower liner thoroughly for hidden water damage before proceeding.
Step 2: Building the New Curb Core
You can rebuild the threshold using stacked wooden framing or high-density EPS foam curbs:
- Wood framing option: Stack three pressure-treated 2x4 lumber boards horizontally. Fasten them securely without penetrating the shower pan liner along bottom corners.
- Pre-formed curb option: Cut a prefabricated waterproof foam curb to length and bed it firmly into a layer of modified thin-set mortar.
Step 3: Critical Waterproofing Steps
Proper waterproofing is the most crucial part when learning how to replace a shower curb:
- Overlap the shower pan liner completely over the newly built curb.
- Fasten cement backer board onto the exterior and top of the curb using specialized corrosion-resistant screws only on outside vertical faces.
- Apply liquid waterproofing membrane across all seams, fastener heads, and curb corners. Embed reinforcing fabric into wet membrane coats to guarantee zero moisture penetration.
Step 4: Tiling and Grouting the Threshold
Once waterproofing cures completely, measure and dry-fit your tiles. Spread thin-set mortar evenly across the top and sides using a notched trowel. Place the tiles with a slight inward slope toward the shower drain (approximately 1/4 inch per foot) to ensure standing water flows back into the pan. Allow mortar to cure for 24 hours, then pack joints with epoxy or high-performance grout. Finally, seal all perimeter joints with 100% silicone sealant.
Professional Help When You Need It
Properly installed curbs prevent costly structural water damage. If you need expert assistance, reach out to 24-7-plumber Wadi Al Amradi for fast and dependable bathroom plumbing and renovation support anytime.
 Shower Curb Replacement, DIY Bathroom, Waterproofing, Tile Installation
