


 Licensed
 All Dubai
 Pipe Repair
How to Fix a Leaking Tee Seal: Step-by-Step
 Mitchell Carter
 Jul 12, 2026
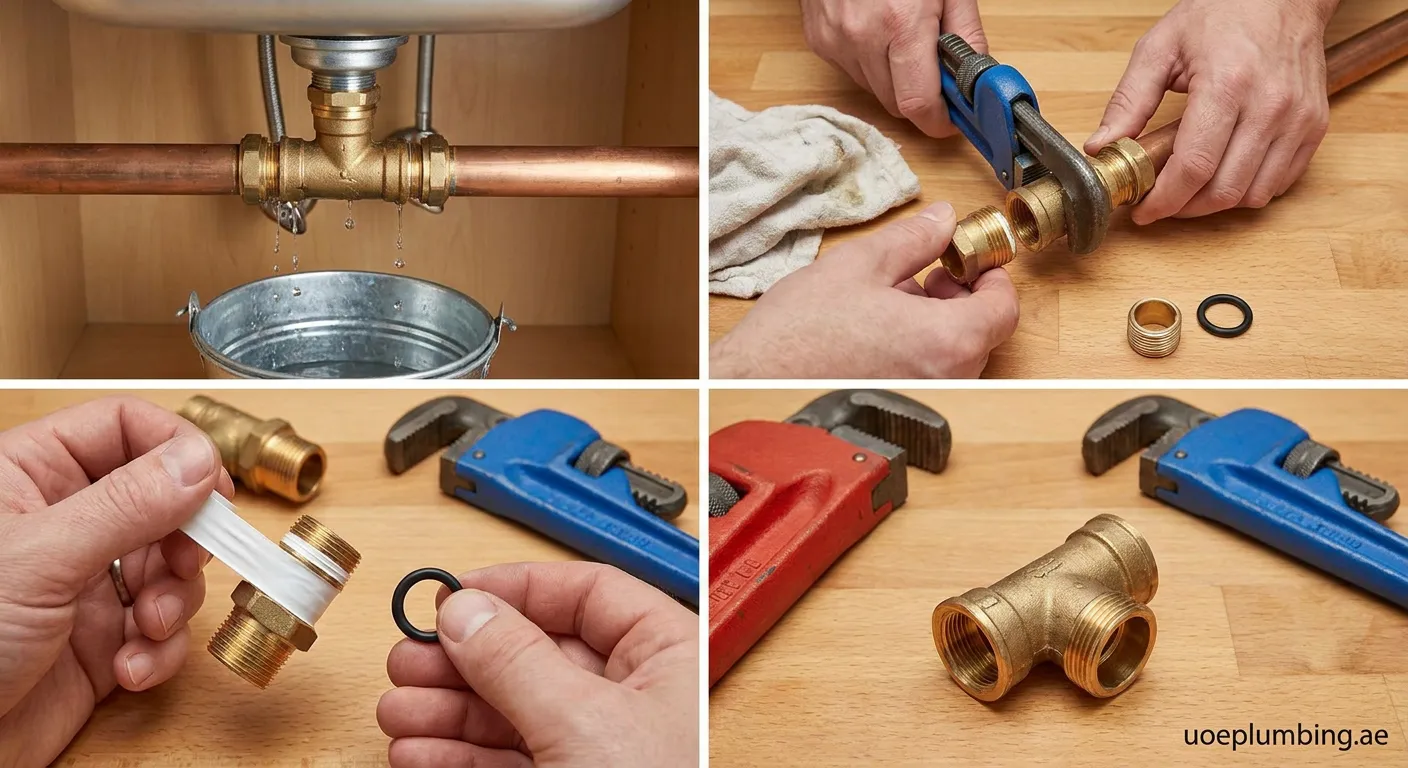
A leaking tee seal can cause water damage and higher bills if left untreated. This guide walks you through diagnosing and repairing the problem quickly and effectively.
What Is a Tee Seal and Why It Leaks
A tee seal is the gasket or compression ring that creates a watertight connection at a T-shaped pipe fitting. When it fails, water escapes at the junction. Understanding how to fix a leaking tee seal starts with identifying why it failed in the first place.
Common Causes of Tee Seal Leaks
- Wear and tear — rubber gaskets degrade over time
- Improper installation — overtightening or undertightening the fitting
- Pipe corrosion — rust eats through the seal surface
- Temperature fluctuations — expansion and contraction weaken the seal
- Water pressure spikes — sudden surges dislodge the gasket
Tools You Need to Fix a Leaking Tee Seal
Before tackling the repair, gather these essentials:
- Adjustable wrench or pipe wrench
- Replacement tee seal gasket (matched to pipe diameter)
- Pipe sealant tape (PTFE/Teflon)
- Cleaning cloth or wire brush
- Bucket and towels for water cleanup
- Pipe thread sealant compound
How to Fix a Leaking Tee Seal: Step-by-Step
Step 1 — Shut Off the Water Supply
Locate the main shut-off valve and turn it clockwise until fully closed. Open a downstream faucet to drain remaining water from the line.
Step 2 — Remove the Tee Fitting
Use your wrench to unscrew the tee fitting at the leaking joint. Work carefully to avoid damaging adjacent pipes. Place a bucket underneath to catch residual water.
Step 3 — Inspect and Clean the Surfaces
Examine the old tee seal for cracks, flattening, or mineral buildup. Clean the interior of the fitting with a wire brush to remove debris and corrosion. A clean surface ensures the new seal sits flush.
Step 4 — Install the New Tee Seal
Insert the replacement gasket into the tee fitting, making sure it seats evenly. Apply a thin layer of pipe sealant or wrap PTFE tape clockwise around the threads — 2 to 3 wraps is usually sufficient.
Step 5 — Reassemble and Tighten
Screw the tee fitting back into place by hand first, then use the wrench to tighten. Avoid overtightening, which can crush the new seal and recreate the leak.
Step 6 — Test for Leaks
Turn the water supply back on slowly. Check the repaired joint with a dry paper towel — if it stays dry after 10 minutes, the repair is successful.
Pro Tips for a Lasting Repair
Always match the replacement tee seal to your pipe material and diameter. A mismatched gasket is the most common reason repairs fail prematurely.
- Use silicone-based lubricant on rubber gaskets for easier installation
- Inspect nearby fittings while you have the system open
- Consider upgrading to a press-fit or push-fit tee for a more durable connection
- If the pipe itself is corroded, replacing the section may be more cost-effective than resealing
When to Call a Professional
Knowing how to fix a leaking tee seal is valuable, but some situations require expert help:
- Leaks behind walls or under floors
- Repeated failures after multiple repair attempts
- Galvanized steel pipes with extensive corrosion
- High-pressure systems that need pressure regulation
A professional can assess whether the entire fitting or pipe section needs replacement.
Stop Leaks Before They Spread
Fixing a leaking tee seal is a manageable DIY task when you follow the right steps and use quality materials. Regular inspection of pipe joints prevents small leaks from becoming costly problems. If you need professional assistance, our Pipe-repair Jumayrā service is ready to help with expert technicians and fast response times.
 leaking tee seal, pipe joint repair, plumbing seal fix, tee fitting leak
