How to Fix a Leaking Cross Seal Step by Step
A leaking cross seal can cause significant water damage if not addressed promptly and correctly.. Understanding how to fix a leaking cross seal saves you money on professional repairs while preventing costly structural damage to your property..
Understanding Cross Seal Leaks
Before learning how to fix a leaking cross seal, it's essential to understand what causes these leaks.. A cross seal is found at pipe intersections where four pipes meet at a central point.. These fittings are common in plumbing systems but prone to wear over time..
Common Causes of Failure
Several factors contribute to cross seal deterioration:
- Age-related degradation of rubber gaskets
- Improper initial installation with misaligned pipes
- Water pressure fluctuations stressing connections
- Corrosion buildup on metal components
- Temperature changes causing expansion and contraction
Tools and Materials Needed
To successfully complete your cross seal repair project, gather these items:
Required Tools:
- Adjustable wrench set
- Pipe wrench
- Wire brush for cleaning
- Utility knife
Materials:
- Replacement gasket kit
- PTFE thread tape
- Pipe joint compound
Step-by-Step Repair Process
Step 1: Locate and Isolate the Leak
The first step in understanding how to fix a leaking cross seal involves accurate diagnosis.. Turn off your main water supply before starting any work.. Drain remaining water from pipes by opening nearby faucets..
Carefully inspect all four connection points around the cross fitting.. Look for visible cracks, loose fittings, or deteriorated gasket material..
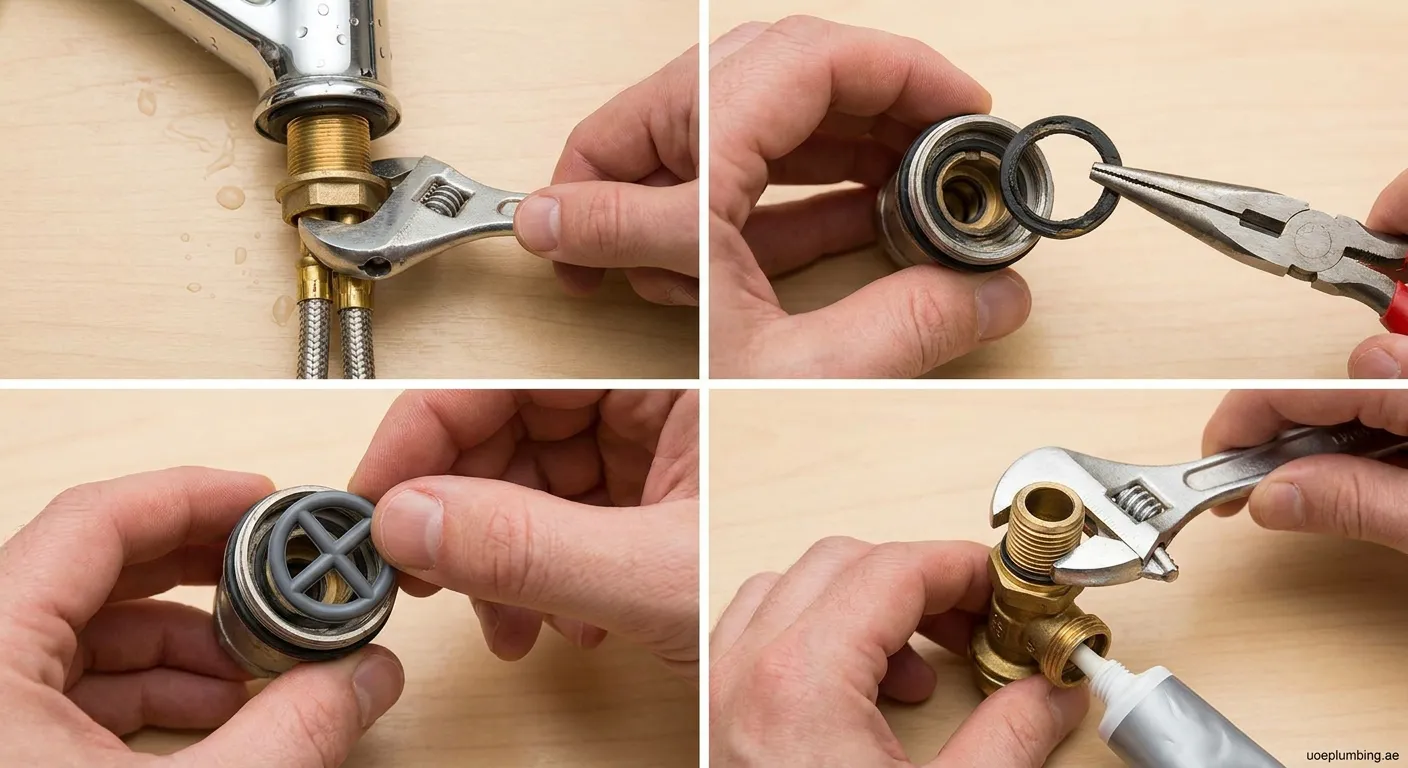
Step 2: Disassemble the Connection
Using your adjustable wrench, carefully loosen each connection point surrounding the affected area.. Work systematically around the fitting rather than removing everything at once..
Pro Tip: Take photos during disassembly to ensure correct reassembly later..
Remove old gasket material completely using your wire brush.. Clean all surfaces thoroughly before proceeding with repairs..
Step 3: Install New Sealing Components
Apply fresh PTFE tape wrapped clockwise around threaded connections – typically three wraps provide adequate coverage without excess bulk..
Position new gaskets properly within their designated grooves ensuring they sit flat without twists or folds..
Step 4: Reassemble and Test Your Work
Tighten all connections gradually in an alternating pattern similar to wheel lug nuts – this ensures even pressure distribution across the entire fitting assembly..
Restore water supply slowly while monitoring the repaired area closely.. Check for any signs of continued leakage immediately following pressurization..
Prevention Strategies for Long-Term Success
After mastering how to fix a leaking cross seal, implement preventive measures:
- Schedule quarterly visual inspections of all accessible pipe joints
- Apply anti-corrosion treatment to metal components annually
- Monitor water pressure to avoid stress on connections
- Avoid chemical drain cleaners near sealed connections
Final Thoughts on Cross Seal Repair
Successfully mastering how to fix a leaking cross seal requires proper tools,, quality materials,, and careful attention during each repair step.. Regular inspections prevent future issues.. For complex repairs,, our Plumber Al Gharayen 4 specialists are ready to assist..