How to Install a Roof Flashing Properly
A leaking roof often stems from poor seals around vents. Learning how to install a roof flashing is a crucial skill for any homeowner looking to prevent costly water damage and maintain a dry home.
Water leaks around vent pipes are among the most common roofing problems. Knowing how to install a roof flashing correctly can save you thousands of dollars in water damage repairs. Whether you are replacing a rusted unit or installing a new vent, the process requires precision and the right materials.
Why Roof Flashing Fails
Before diving into the installation, it helps to understand why this part of the roof is vulnerable. Flashing creates a watertight seal between the roof surface and the plumbing vent pipe. Over time, the rubber boot can crack due to UV exposure, or the metal base can corrode. When this happens, learning how to install a roof flashing becomes an immediate priority to stop water from running down the pipe into your attic or walls.
Tools and Materials Needed
To perform this job safely and effectively, gather the following:
- New Vent Flashing: Ensure it matches the diameter of your pipe (usually 1.5 to 4 inches).
- Flat Pry Bar: To lift shingles without breaking them.
- Roofing Nails: Galvanized nails are essential to prevent rust.
- Roofing Cement/Sealant: High-quality polyurethane or silicone for exterior use.
- Hammer: For securing the new flashing.
- Utility Knife: To cut shingles if necessary.
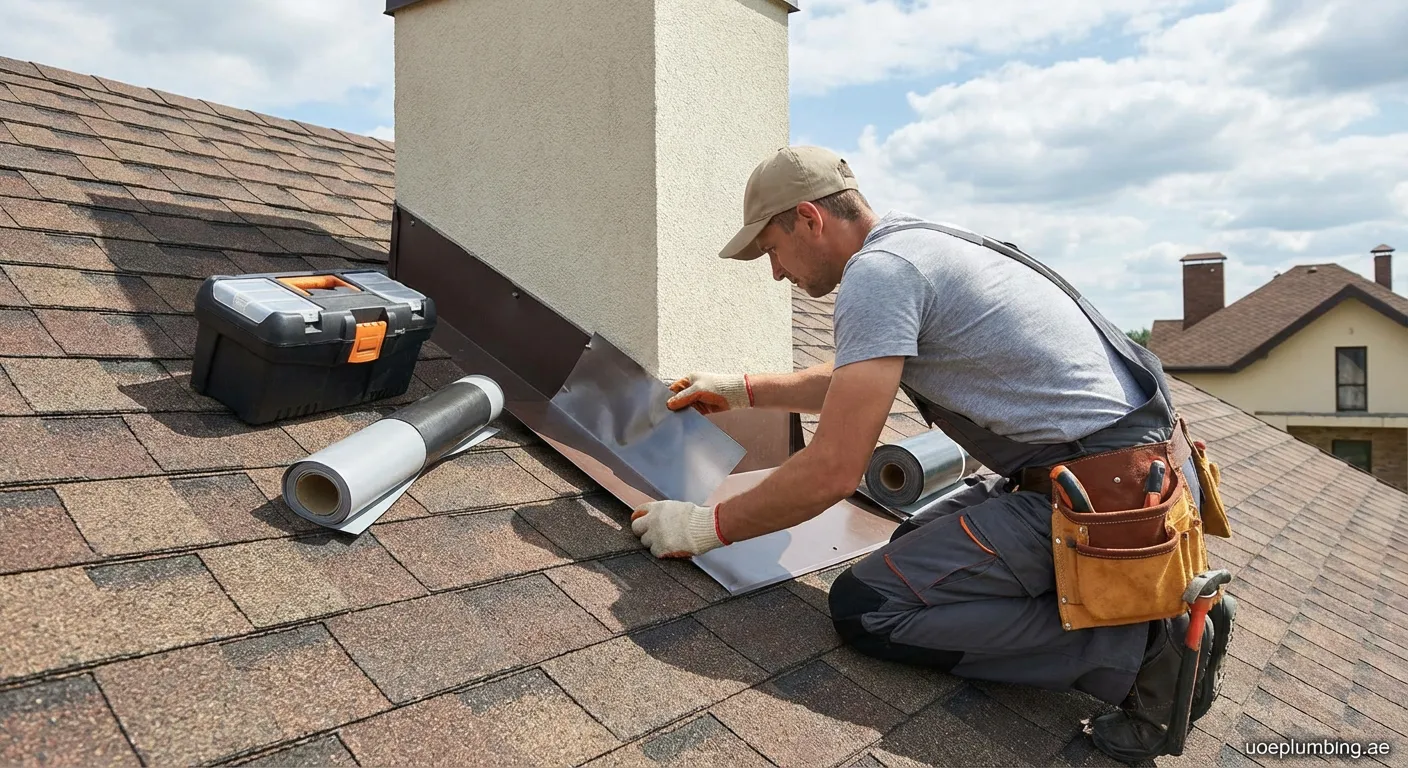
Step-by-Step Guide on How to Install a Roof Flashing
1. Clear the Area
Start by removing the old flashing. Use your pry bar to gently lift the shingles surrounding the vent stack. You will need to remove the nails holding the shingles directly above and to the sides of the vent. Do not disturb the shingles below the vent more than necessary. Once the nails are out, slide the old flashing unit up and off the pipe.
2. Prepare the Surface
Scrape away old roofing cement from the roof deck and the pipe. A clean surface is vital for a good seal. If the shingles around the area are brittle or damaged, this is the time to replace them as well.
3. Install the New Flashing
Slide the new flashing unit over the vent pipe. The base of the flashing should slide under the top shingles and the side shingles, but it must sit on top of the lower shingles. This "shingle-style" layering allows water to run off naturally without getting trapped.
4. Secure the Flashing
Lift the upper shingles and nail the top corners of the flashing base to the roof deck. Apply a bead of roofing sealant to the nail heads to prevent leaks. Crucially, when figuring out how to install a roof flashing, remember: never nail the bottom of the flange exposed to the weather unless you cover the nails heavily with sealant. Ideally, the bottom part relies on the overlap for water shedding.
Common Mistakes to Avoid
- Using the wrong size boot: This creates gaps where water enters.
- Nailing through the bottom flange: This creates direct holes for water to seep in.
- Ignoring safety: Always wear non-slip shoes and use a harness when working at heights.
By following these steps, you ensure a watertight seal that protects your home’s structural integrity.
Final Thoughts on Roof Repair
Properly sealing your roof vents ensures longevity and prevents mold. If you are unsure about climbing the roof, we also have a service in Jebel Ali Port, so check our 24-7-plumber Jebel Ali Port page for local assistance.