How to Replace a Toilet Tank Nut: A Guide
Is your toilet leaking or wobbling? The issue might be a corroded fastener. Learn how to replace a toilet tank nut quickly to prevent water damage and restore stability.
Dealing with a leaking toilet can be stressful, especially when water starts pooling around the base. Often, the culprit is worn-out hardware connecting the tank to the bowl. Knowing how to replace a toilet tank nut and the associated bolts is a fundamental DIY skill that can save you money and prevent water damage.
Understanding the Problem
Before diving into the repair, it is crucial to identify which nut is causing the issue. Generally, there are two types of nuts associated with the toilet tank:
- Tank-to-Bowl Bolts and Nuts: These hold the tank securely to the bowl. If these fail, the tank will wobble or leak.
- Water Supply Line Coupling Nut: This connects the water supply to the fill valve.
This guide focuses on how to replace a toilet tank nut regarding the mounting hardware, which is the most common source of tank instability and leaks.
Tools and Materials Required
To successfully complete this task, gather the following tools:
- Adjustable wrench or basin wrench
- Large flathead screwdriver
- Penetrating oil (like WD-40) for rusted bolts
- New tank-to-bowl gasket and bolt kit (ensure it fits your toilet model)
- Sponge and bucket
- Old towels
Step-by-Step Guide: How to Replace a Toilet Tank Nut
Follow these steps carefully to ensure a watertight seal.
1. Preparation and Draining
Turn off the water supply valve located behind the toilet. Flush the toilet and hold the handle down to drain as much water as possible from the tank. Use a large sponge to soak up the remaining water. A dry tank is essential when learning how to replace a toilet tank nut without making a mess.
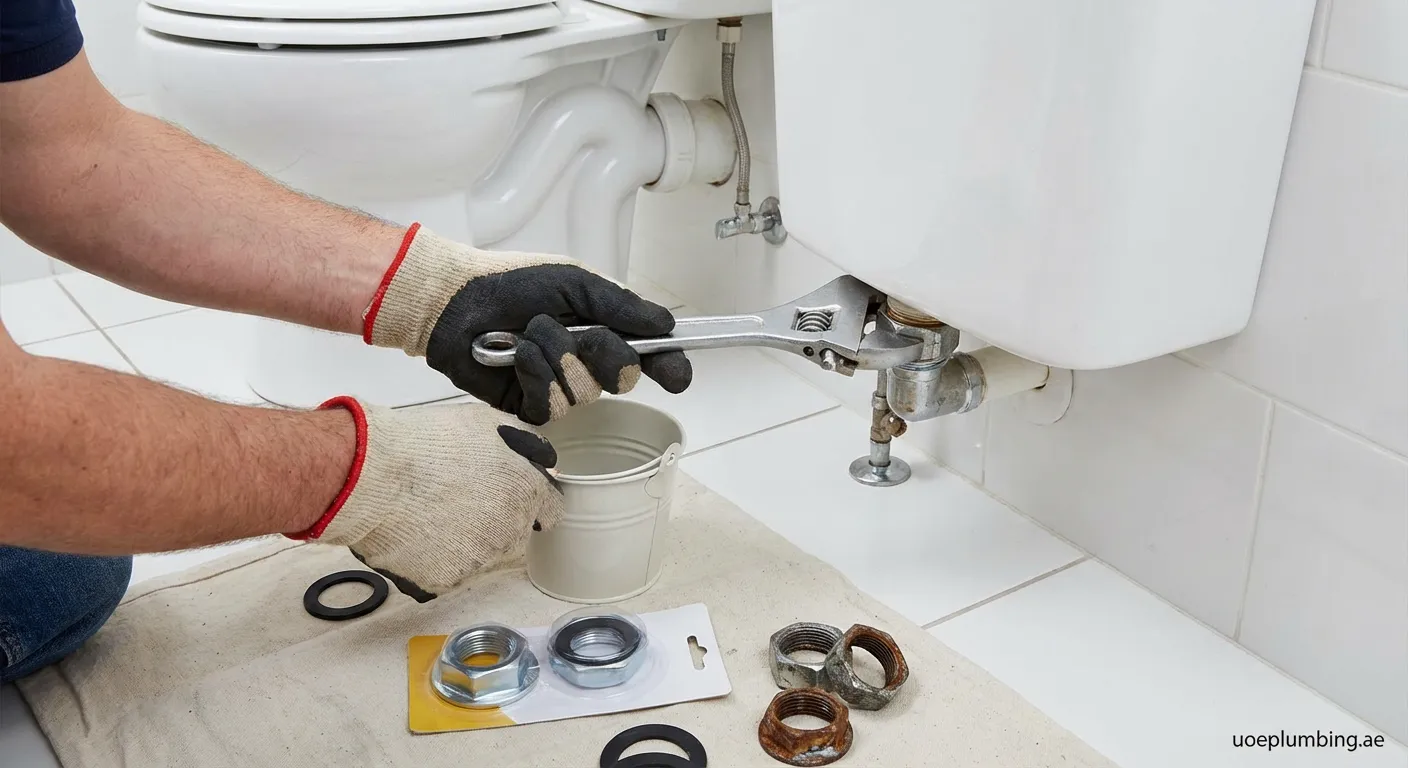
2. Removing the Old Hardware
This is often the hardest part. Locate the nuts under the tank shelf at the back of the bowl.
- Apply penetrating oil if the nuts look rusted and wait 15 minutes.
- Use the screwdriver to hold the bolt head inside the tank while turning the nut underneath with your wrench.
- Pro Tip: If the nut is seized and won't turn, you may need to carefully cut the bolt with a mini-hacksaw. Be extremely careful not to crack the porcelain.
3. Cleaning the Surfaces
Once the tank is removed, clean the area where the tank sits on the bowl. Remove the old spud washer (the large rubber gasket) and any mineral buildup. A clean surface is vital for the new seal.
4. Installing the New Hardware
Place the new large rubber gasket (spud washer) over the flush valve nut on the bottom of the tank.
- Insert the new rubber washers onto the new bolts.
- Place the bolts through the holes from inside the tank.
- Position the tank back onto the bowl, aligning the bolts with the holes in the bowl.
5. Securing the Tank
Thread the washers and nuts onto the bolts protruding underneath the bowl.
- Hand-tighten the nuts first.
- Use the wrench to tighten them further, alternating between the left and right sides.
- Warning: Do not overtighten. Cracking the porcelain is a common mistake when learning how to replace a toilet tank nut. Tighten until snug and the tank no longer rocks.
Testing for Leaks
Turn the water supply back on and let the tank fill. Check underneath for any drips. If you see a slight leak, tighten the nut on that side by a quarter turn. Dry the area with a paper towel and check again after 10 minutes.
Note: Using stainless steel or brass bolts is recommended over coated steel, as they resist corrosion and make future repairs significantly easier.
By following these instructions, you ensure a stable toilet and a dry floor. Mastering this simple plumbing task prevents minor issues from becoming major floods.
Final Thoughts on Tank Repair
Replacing old hardware is a vital skill for home maintenance. If you find the job too difficult or leaks persist, professional help is available. We also have a service in Al Qusais 1, so visit Plumbing-services Al Qusais 1 for assistance.