How to Install a Water Conditioner: Complete DIY Guide
Wondering how to install a water conditioner in your home? This comprehensive guide walks you through each step of the installation process, from preparation to testing.
Understanding Water Conditioner Basics
A water conditioner is an essential device that treats hard water problems without using salt or chemicals. Unlike traditional water softeners, conditioners use template-assisted crystallization to neutralize minerals. Understanding how to install a water conditioner starts with knowing your system type.
Types of Water Conditioners
- Salt-free conditioners
- Electromagnetic conditioners
- Carbon-based filtration systems
- Catalytic media conditioners
Each type has specific installation requirements that we'll cover below.
Tools and Materials Needed
Before learning how to install a water conditioner, gather these essential tools:
Required Tools:
- Pipe cutter or hacksaw
- Adjustable wrenches (2)
- Teflon tape
- Soldering torch (if using copper pipes)
- Measuring tape
- Level
- Safety glasses
Materials:
- Water conditioner unit
- Appropriate fittings (shark bite or compression)
- PVC or copper pipe sections
- Bypass valve kit
- Drain tubing
Step-by-Step Installation Process
Step 1: Choose the Right Location
Selecting the proper location is crucial when figuring out how to install a water conditioner effectively:
- Choose a spot near your main water line entry point
- Ensure adequate space for maintenance access (minimum 12 inches clearance)
- Locate near a drain for backwash discharge
- Avoid areas subject to freezing temperatures
- Consider proximity to electrical outlets if your unit requires power
Step 2: Shut Off Water Supply
Turn off your home's main water supply valve. Open faucets throughout the house to drain remaining water from the pipes. This prevents messy spills during installation.
Step 3: Install the Bypass Valve
The bypass valve allows water flow during maintenance:
- Cut the main water line at your chosen installation point
- Install the bypass valve according to manufacturer instructions
- Use Teflon tape on threaded connections to prevent leaks
- Tighten all fittings securely with wrenches
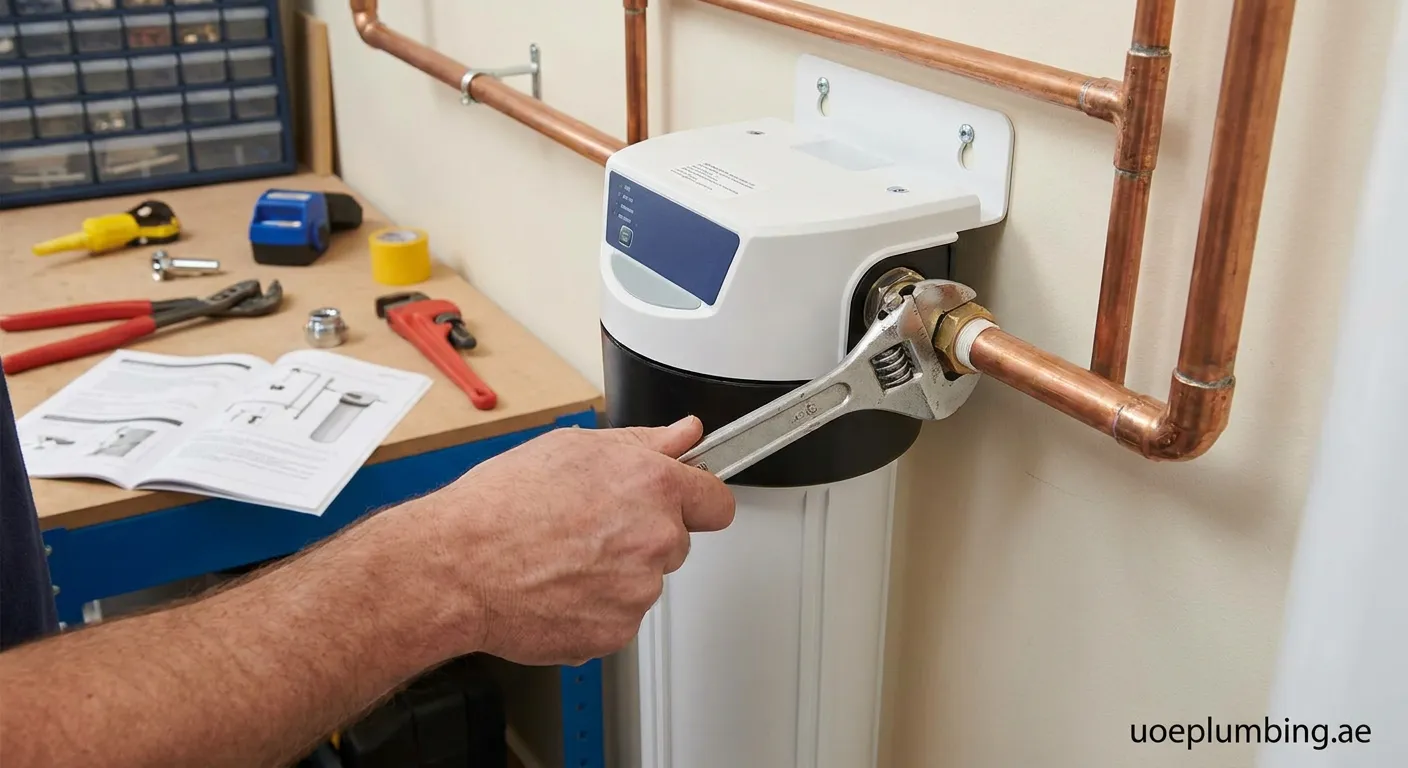
Step 4: Connect the Conditioner Unit
Position your water conditioner unit near the bypass valve:
- Measure and cut inlet/outlet pipes to proper length
- Connect inlet pipe from bypass valve to conditioner inlet port
- Connect outlet pipe from conditioner to the main water line continuation
- Ensure all connections are tight and properly sealed
- Double-check arrow indicators showing proper water flow direction
Step 5: Connect Drain Line
Most conditioners require a drain connection for backwashing:
- Attach drain tubing to the unit's drain port
- Route tubing to a floor drain or laundry tub
- Secure the drain line properly to prevent dislodging during operation
- Maintain proper drainage slope (at least 1/4 inch per foot)
Step 6: Electrical Connections (If Applicable)
Some advanced conditioners need electrical power:
- Plug the unit into a grounded outlet near the installation site. Avoid using extension cords when possible. Verify that all electrical connections meet local codes. Follow manufacturer guidelines strictly. Test all wiring before proceeding further. Make sure power is stable throughout testing phases. Double-check polarity on connections if applicable. Ensure safe distance from any potential water sources. Consult an electrician if you are uncertain about any electrical aspects. Keep cords organized and away from high traffic areas. Inspect regularly for wear or damage. Replace damaged components immediately. Never ignore warning signs like sparking or unusual heat. Always unplug before servicing electrical parts. Document all electrical work done. Keep documentation accessible for future reference. Stay safe while handling electricity!
Final Installation Tips
Installing a water conditioner improves your home's water quality significantly. Follow this guide carefully for best results. For drain issues during installation, our Drain-cleaning Masfout 12 service is ready to help you maintain optimal system performance.