


 Licensed
 All Dubai
 Plumbing Guides
How to Install a Pipe Saddle: Complete Step-by-Step Guide
 Marcus Thompson
 Aug 06, 2026
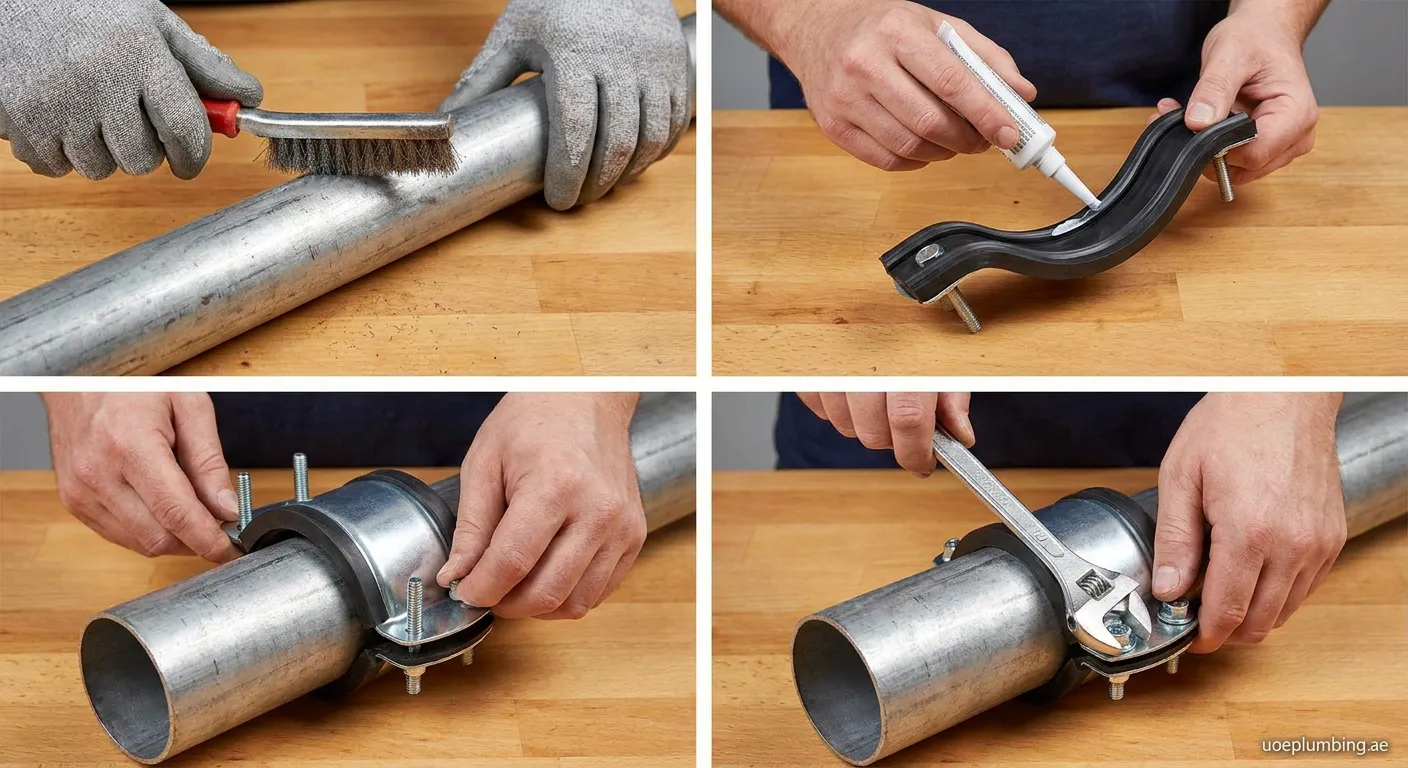
Learning how to install a pipe saddle properly ensures leak-free connections in your plumbing system. This guide covers essential tools, materials, and professional techniques for successful installation.
What Is a Pipe Saddle?
A pipe saddle is a specialized plumbing fitting designed to create a branch connection from a larger main pipe to a smaller secondary line. This essential component is widely used in residential and commercial plumbing systems for drainage, venting, and water distribution applications.
Types of Pipe Saddles
Before learning how to install a pipe saddle, it's important to understand the available options:
- PVC pipe saddles – Most common for residential drainage systems
- ABS pipe saddles – Used in specific plumbing codes and regions
- Cast iron saddles – Found in older commercial buildings
- Copper pipe saddles – Used in water supply lines
Tools and Materials Needed
Gather these essential items before starting your installation:
- Pipe saddle fitting (matching your pipe material)
- Tape measure or ruler
- Marker or pencil
- Hacksaw or PVC cutter
- File or sandpaper (100-grit)
- PVC primer (for PVC installations)
- PVC cement or appropriate adhesive
- Safety glasses and gloves
- Clean rag or paper towels
- Deburring tool or utility knife
Step-by-Step Guide: How to Install a Pipe Saddle
Step 1: Select the Correct Location
Choose the installation point carefully. Consider:
- Accessibility for future maintenance
- Structural support requirements
- Local plumbing codes and regulations
- Distance from fixtures and fittings
Important: Never install a saddle within 2 inches of a joint or another fitting.
Step 2: Prepare the Main Pipe Surface
Clean the area thoroughly using a dry cloth. Remove any dirt, grease, or debris that could interfere with proper adhesion. For PVC pipes, use PVC cleaner on both the pipe surface and the inside of the saddle opening.
Step 3: Mark the Connection Point
Place the saddle against the main pipe at the desired angle (typically 45° or 90°). Trace around the opening with a marker to identify where the branch will connect.
Step 4: Cut the Branch Pipe Opening
carefully cut out the marked section using a hole saw or appropriate cutting tool. The opening should match the saddle's outlet size exactly.
Pro tip: A slightly smaller hole is better than an oversized one – you can always enlarge it.
Step 5: Apply Primer and Cement (for PVC)
For PVC installations:
- Apply purple primer to the inside of the saddle opening and the prepared area on the main pipe. Wait 10-15 seconds.
- Apply a generous coat of PVC cement to both surfaces.
- Work quickly – PVC cement sets within 20-30 seconds.
- Press the saddle firmly onto the pipe, holding it in position for at least 30 seconds.
- Wipe away any excess cement immediately with a clean cloth.
- Allow proper curing time before testing.
- Follow manufacturer's guidelines.
- Wait recommended time before testing.
- Ensure proper alignment throughout process.
- Double-check all connections before proceeding.
Final Tips for Success
Installing a pipe saddle is a manageable DIY task with proper preparation and tools. Follow our step-by-step guide for reliable results. If you need professional assistance, we offer expert water heater repair services in Al Fahlain Water-heater-repair Al Fahlain.
 pipe saddle, plumbing installation, pipe fitting, DIY plumbing
