How to Install a Linear Shower Drain: Complete Guide
Installing a linear shower drain transforms your bathroom's functionality and aesthetics. This comprehensive guide covers everything from tools needed to final testing for perfect results.
Understanding Linear Shower Drains
A linear shower drain offers superior water management compared to traditional round drains. Before learning how to install a linear shower drain, understand its components: the drain channel, grate, clamping ring, and waterproofing membrane.
Benefits of Linear Drains
- Modern aesthetic appeal
- Efficient water evacuation
- Easier cleaning access
- Flexible placement options
Tools and Materials Needed
Gather these essentials before starting:
| Tools | Materials |
|---|---|
| Spirit level | Linear drain kit |
| Trowel | Waterproofing membrane |
| Measuring tape | Thin-set mortar |
| Angle grinder | Tile adhesive |
| Rubber mallet | Silicone sealant |
Step-by-Step Installation Process
1. Plan the Drain Position
Determining where to install a linear shower drain is crucial. Position it near the shower wall or at the entrance. Ensure the drain connects properly to existing plumbing pipes.
2. Prepare the Subfloor
Clean the installation area thoroughly. Remove debris and ensure the surface is level. Apply a pre-slope if required by your local building codes.
Important: A minimum slope of 1-2% toward the drain is mandatory for proper water flow.
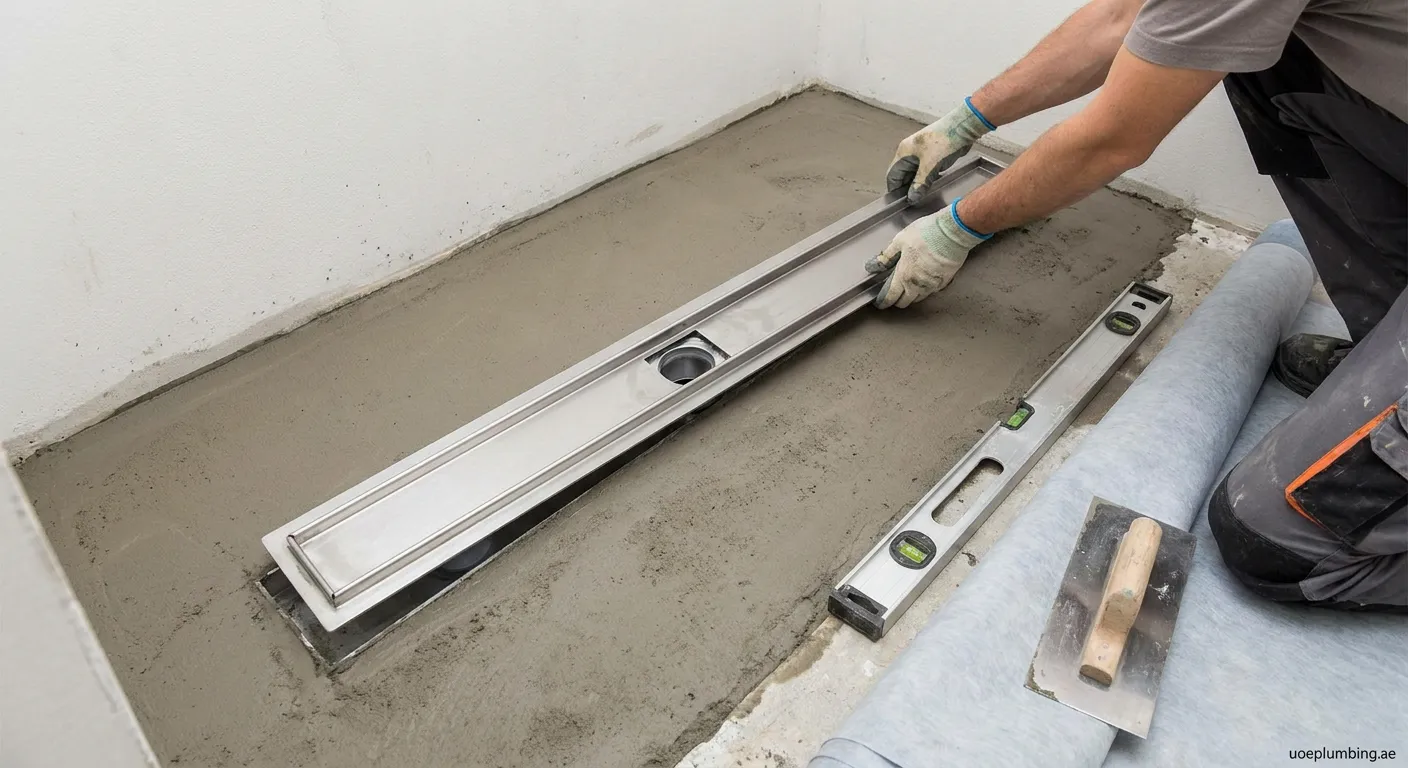
3. Install the Drain Body
Connect the drain body to the waste pipe using appropriate fittings. Secure connections with PVC cement or rubber gaskets depending on your pipe material.
When installing linear shower drains, verify:
- Proper alignment with floor tiles
- Correct height adjustment
- Watertight connections
4. Create the Slope
Build up mortar bed creating a single-direction slope toward the drain. Use a straightedge to ensure consistent gradient across the entire shower floor.
5. Apply Waterproofing
Apply waterproofing membrane around the drain flange and entire shower area. This critical step prevents water infiltration beneath tiles.
6. Install Tiles Around Drain
Cut tiles precisely to fit around the drain channel. Leave appropriate gaps for expansion and grout application.
Common Installation Mistakes to Avoid
- Insufficient slope - Causes water pooling
- Poor waterproofing - Leads to structural damage
- Incorrect drain height - Creates tripping hazards
- Skipping testing phase - Misses potential leaks
Testing Your Installation
After completing how to install a linear shower drain steps:
- Pour water into the drain opening
- Check all connections for leaks
- Verify proper drainage speed
- Test grate fit and removal ease
Final Thoughts on Installation
Mastering how to install a linear shower drain requires attention to detail and proper preparation. Follow each step carefully for professional results. Need expert help? Our specialists provide quality Water-heater-repair in Wadi Al Safa 6 services for all your plumbing needs.