How to Install a Freestanding Tub Filler: Pro Guide
Upgrade your bathroom with a sleek floor-mounted faucet. This guide explains exactly how to install a freestanding tub filler safely and correctly.
Installing a floor-mounted faucet adds a touch of luxury to any bathroom renovation. However, the process requires precision plumbing and careful planning. Below is a comprehensive guide on how to install a freestanding tub filler properly.
Tools and Materials Needed
Before you begin, gather the following essentials:
- Drill with masonry or wood bits
- Adjustable wrenches and Allen keys
- Level and measuring tape
- Plumber’s tape (Teflon tape)
- Silicone sealant
- The manufacturer's rough-in kit
Step 1: Preparation and Rough-In
The most critical part of learning how to install a freestanding tub filler happens before the finished floor is laid.
- Locate the Supply Lines: Determine exactly where the tub will sit. The filler usually sits 3 to 6 inches away from the tub rim.
- Install the Rough-in Valve: Secure the mounting bracket to the subfloor. Ensure the hot and cold water lines are connected to the correct inputs on the rough-in valve.
- Pressure Test: Cap the lines and turn on the water to test for leaks before closing up the floor. This prevents costly damage later.
Step 2: Flooring Installation
Once the rough-in is secure and tested, the finished floor (tile, wood, or stone) must be installed around the stub-out pipes.
- Precision Cuts: Ensure the hole in your flooring is minimized to be covered completely by the escutcheon (base plate) of the filler.
- Protect the Pipes: Keep the protective cover on the rough-in valve during tiling to prevent debris from entering the system.
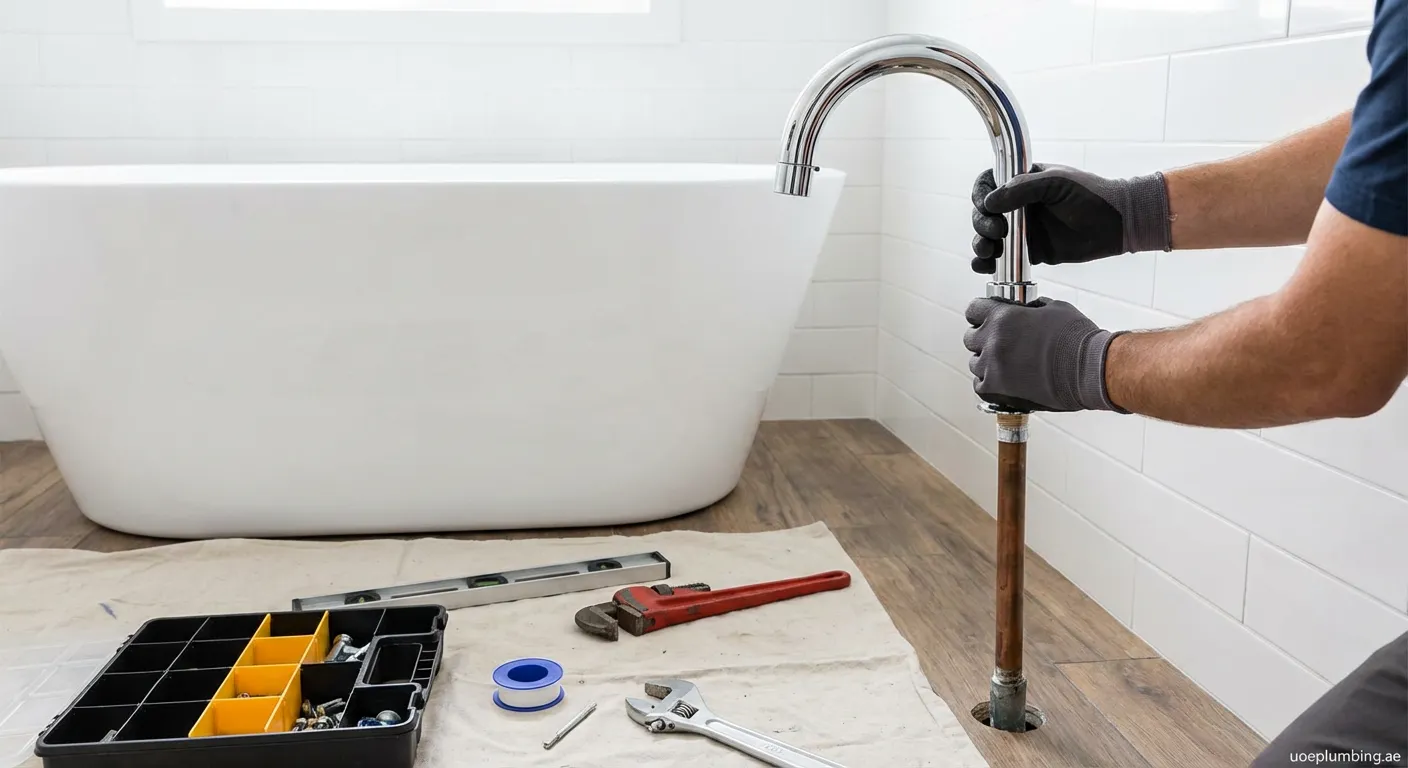
Step 3: Mounting the Tub Filler
Now comes the final assembly. This is the core of how to install a freestanding tub filler.
- Apply Sealant: Apply a bead of silicone sealant to the bottom of the base plate to prevent water from seeping under the floor.
- Connect Supply Lines: Attach the flexible braided supply lines from the faucet body to the hot and cold water pipes protruding from the floor. Use plumber's tape on threaded connections.
- Secure the Body: Slide the faucet body over the mounting bracket. Align it perfectly using a level. Tighten the set screws or mounting bolts provided by the manufacturer.
Step 4: Final Connection and Testing
Do not skip the final check.
- Flush the Lines: Remove the aerator and turn the water on slowly to flush out any construction debris.
- Check for Leaks: Inspect the base and all connections for moisture.
- Secure the Hand Shower: If your model includes a hand shower, attach the hose and wand, ensuring washers are in place.
Understanding how to install a freestanding tub filler allows you to achieve a high-end look, but always prioritize leak prevention over speed.
Finalizing Your Installation
Mastering the installation ensures a leak-free, elegant bathroom. If the project feels too complex, we offer services in Saih Shua'ilah. Contact our 24-7-plumber Saih Shua'ilah team for expert help today.