


 Licensed
 All Dubai
 Plumbing Guides
How to Install a Sewage Ejector Pump at Home
 Alex Morgan
 Oct 15, 2026
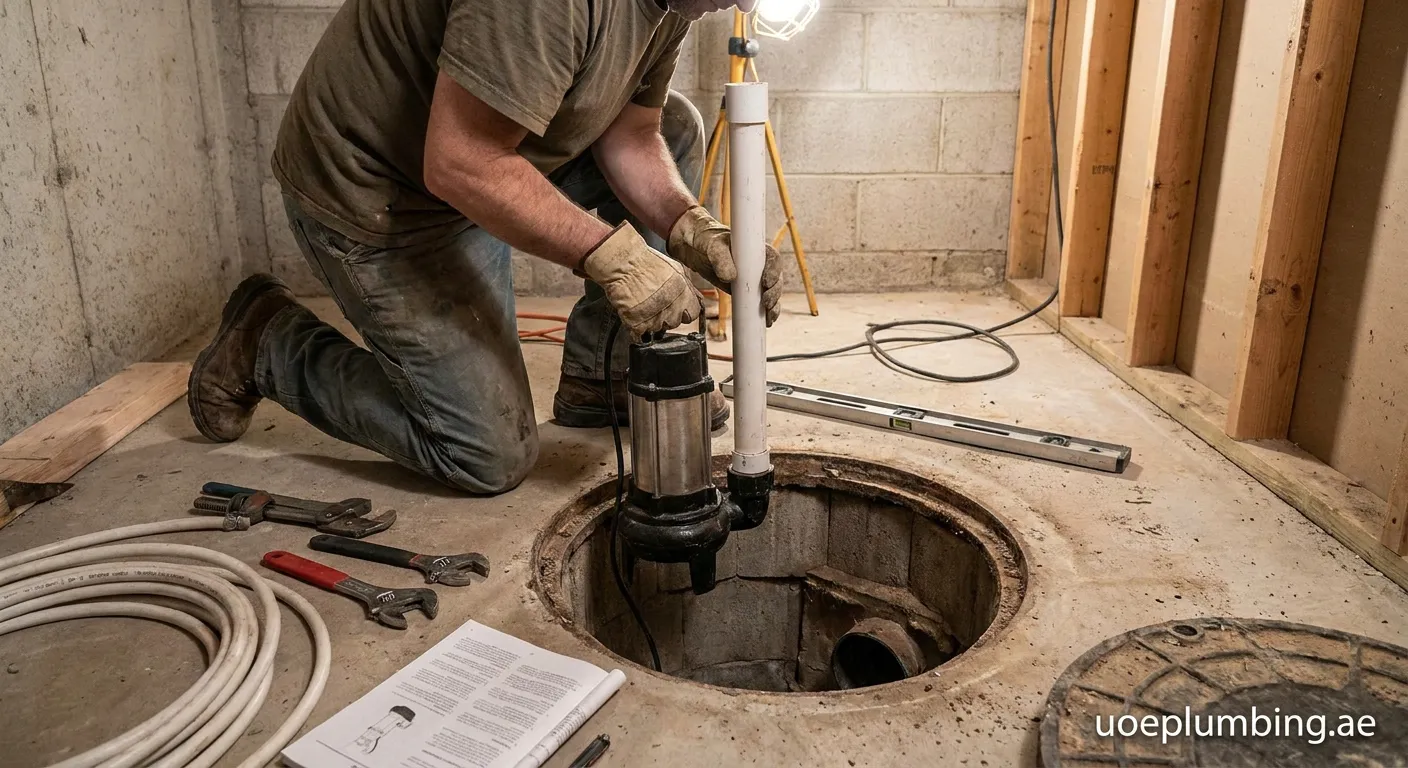
Planning a basement bathroom? Knowing how to install a sewage ejector pump ensures safe wastewater discharge below the main sewer line. Here is your complete DIY guide.
Understanding Basement Waste Systems
When adding a bathroom, laundry room, or utility sink below your municipal sewer line, gravity alone cannot move wastewater out. Understanding how to install a sewage ejector pump is vital for any homeowner looking to expand basement living space. A sewage ejector system collects solids and wastewater in a sealed sump basin and pumps it upward to the primary sewer pipe.
Key System Components
- Ejector Basin: A heavy-duty polyethylene or fiberglass basin recessed into the floor.
- Submersible Pump: A dedicated pump with an impeller that handles up to two-inch solid waste.
- Discharge Pipe: PVC pipe running from the pump to the main sewer discharge line.
- Vent Pipe: Releases sewer gases outside and prevents hydraulic airlocks.
- Check Valve: Prevents backflow from returning to the basin once pumped.
Tools and Materials Required
Before learning how to install a sewage ejector pump, gather the necessary equipment:
- Submersible sewage ejector pump kit
- Rigid schedule 40 PVC pipes (2-inch diameter) and PVC primer/cement
- Full-flow check valve and ball shut-off valve
- Basin cover with gas-tight rubber gaskets
- Drill, hole saw, level, adjustable wrenches, and safety goggles
Step-by-Step Installation Process
1. Preparing and Placing the Basin
Excavate a hole in the concrete slab large enough for the basin and 4 to 6 inches of crushed gravel underneath for stability. Level the basin and connect the incoming gravity drain lines from basement fixtures into the inlet hub.
2. Setting Up the Pump and Discharge Piping
Thread a 2-inch PVC discharge nipple into the discharge port of the pump. Fasten the float switch at the manufacturer’s recommended height so the pump activates automatically before liquid levels reach the inlet. Lower the pump into the bottom of the basin.
3. Assembling the Lid and Vent Lines
Feed the discharge pipe and electrical cords through the basin lid gaskets. Thread a 2-inch PVC vent pipe into the vent flange on the basin lid. Connect this vent pipe to your home's existing plumbing vent stack to ensure gas odors dissipate safely above the roofline.
Safety Warning: Never connect an ejector basin vent to a standard air admittance valve (AAV) unless explicitly permitted by local plumbing code, as ejector pumps require active airflow venting.
4. Installing Valves and Making Sewer Connections
Mount a check valve on the vertical discharge line above the basin lid, followed by a gate or ball valve. Run the discharge line upward and tie it into the main building drain using a wye fitting angled in the direction of sewer flow.
5. Sealing and Testing the System
Bolt down the basin lid tightly with its rubber gasket to form a hermetic seal against sewer vapors. Fill the basin with water using a garden hose to test the float switch, check for pipe leaks, and confirm rapid discharge.
Maintenance and Best Practices
Knowing how to install a sewage ejector pump also means understanding long-term maintenance. Inspect the float switch semi-annually and avoid flushing non-biodegradable items, wipes, or harsh chemicals that can clog the impeller.
Professional Plumbing Solutions
Proper installation prevents costly basement floods. For complex sewer lines or expert maintenance, our team is ready. Contact our trusted Emergency-plumber Jumeira Island 2 for fast, professional plumbing support.
 sewage ejector pump, plumbing installation, basement plumbing, waste pump
