


 Licensed
 All Dubai
 Plumbing Guides
How to Install a Pipe Clamp: Step-by-Step Guide
 Alex Turner
 Sep 24, 2026
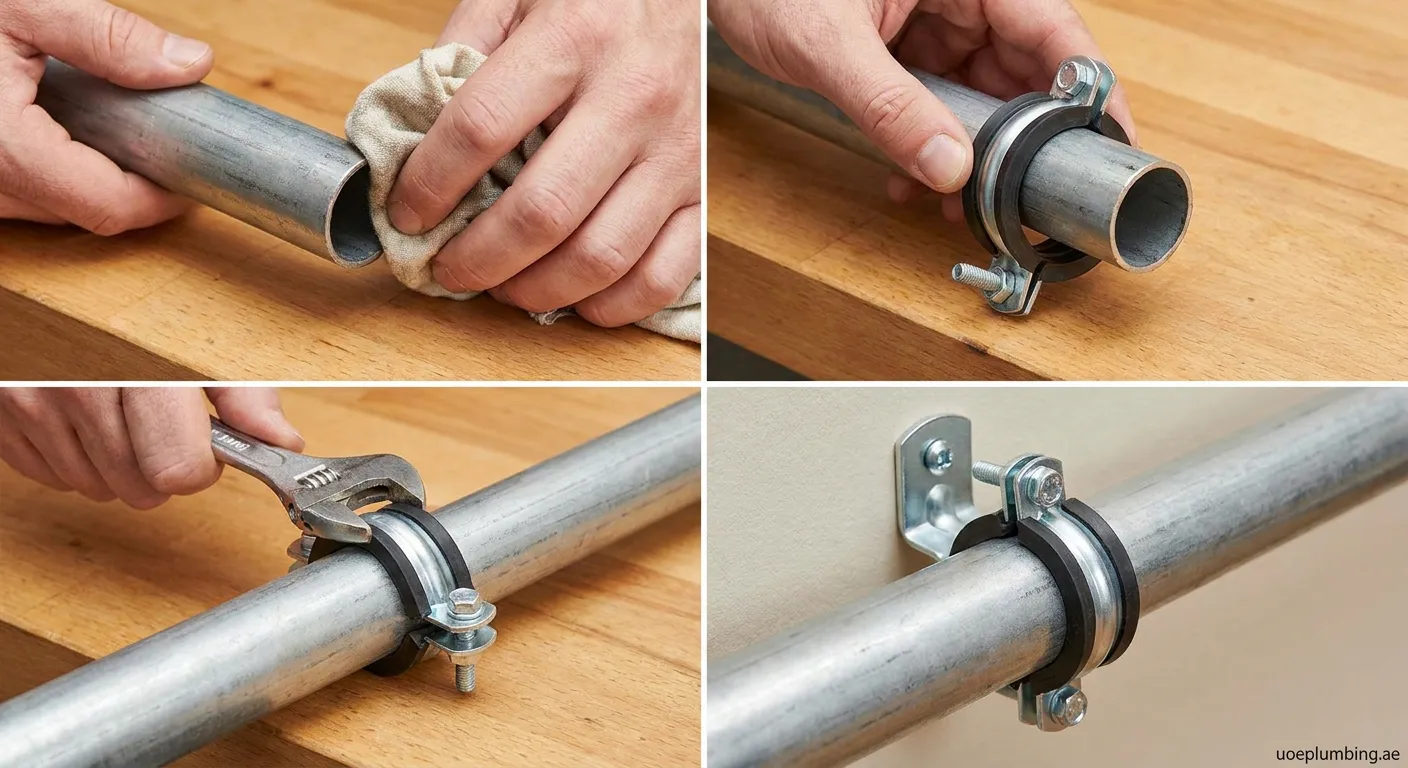
Dealing with a pinhole leak or securing loose plumbing? Learning how to install a pipe clamp is a vital DIY skill that helps protect your home from sudden water damage.
A burst or leaking line can quickly cause severe structural damage if not addressed immediately. Learning how to install a pipe clamp allows homeowners and technicians to fix pinhole punctures, reinforce unstable lines, and buy valuable time before scheduling permanent pipe replacement.
What Is a Pipe Clamp and When Should You Use It?
A pipe clamp is a mechanical device designed to secure plumbing lines to structural surfaces or seal unexpected punctures. Depending on your situation, you will generally encounter two primary types:
- Plumbing repair clamps: Feature a flexible stainless steel band lined with a heavy-duty rubber gasket to seal emergency pipe bursts or pinhole leaks.
- Support & mounting clamps: Rigid brackets (such as cushion clamps, U-bolts, or split rings) used to anchor copper, PEX, or PVC lines firmly to studs and joists.
Important Note: A repair clamp is an effective immediate emergency measure for localized punctures, but severely corroded pipes should eventually be replaced by a licensed technician.
Tools and Materials Required
Before starting, assemble the necessary supplies:
- Appropriate size repair clamp or mounting bracket
- Adjustable wrench or socket set
- Wire brush and emery cloth / sandpaper
- Mild degreaser and clean shop rags
- Personal protective equipment (safety goggles and gloves)
Step-by-Step: How to Install a Pipe Clamp
Follow this simple tutorial to achieve a watertight seal or steady mounting:
Step 1: Shut Off the Main Water Line
Prioritize safety by turning off the nearest isolation valve or the main water shutoff. Relieve residual pressure by opening the lowest faucet in the building.
Step 2: Clean the Target Surface
Smooth surface contact is crucial. Use an emery cloth or wire brush to scrub away dirt, mineral scale, and oxidation around the damaged area. Wipe clean with a dry rag.
Step 3: Position the Gasket Correctly
Center the internal rubber pad directly over the puncture. Ensure the gasket covers at least one inch beyond the leak perimeter in all directions.
Step 4: Fasten the Outer Band
Wrap the metal collar around the rubber sleeve. Align the bolt holes and insert the carriage bolts manually to prevent cross-threading.
Step 5: Tighten Bolts Evenly
Using your wrench, tighten the bolts alternately in small increments. This equalizes compression across the rubber seal, preventing pinches or gaps. Avoid over-torquing, which can warp copper or crush PVC pipes.
Step 6: Test for Leaks
Reopen the water valve gradually. Inspect the clamp perimeter under full pressure to confirm a 100% leak-free seal.
Pro Tips for Reliable Clamp Installation
- Select the exact diameter: Standard residential pipes are sized by nominal inside diameter (copper tubing size vs. iron pipe size differ significantly).
- Do not use on high-pressure steam lines: Standard rubber gaskets are rated for specific temperature and pressure limits.
- Monitor over time: Inspect the clamp regularly for signs of rubber degradation or recurring moisture.
Expert Plumbing & Emergency Support
Mastering clamp installation prevents major water leaks. If you face persistent plumbing issues, our experts provide certified Water-heater-repair Al Rashidiya and general pipe maintenance across the region to ensure safe operation.
 Pipe Repair, Plumbing Tips, DIY Plumbing, Pipe Clamp
