How to Fix a Leaking Buffer Seal: Expert Guide
Dealing with hydraulic leaks? Discover how to fix a leaking buffer seal quickly. This guide covers tools, safety steps, and installation tips for a secure repair.
Finding a leak in your hydraulic system or high-pressure pump can be stressful, especially when it involves the buffer seal. This component plays a critical role in absorbing pressure spikes and protecting the main rod seal. Learning how to fix a leaking buffer seal can save you significant downtime and repair costs.
Understanding the Buffer Seal
Before diving into the repair, it is essential to understand what you are fixing. The buffer seal is typically located in the cylinder head, "upstream" from the rod seal. Its primary job is to buffer the pressure fluctuations that occur during operation. When this seal fails, the main rod seal is exposed to excessive pressure, leading to catastrophic leaks.
Common Signs of Failure
- Visible fluid leakage around the cylinder rod.
- Reduced performance or sluggish movement.
- Extrusion or physical damage to the seal material.
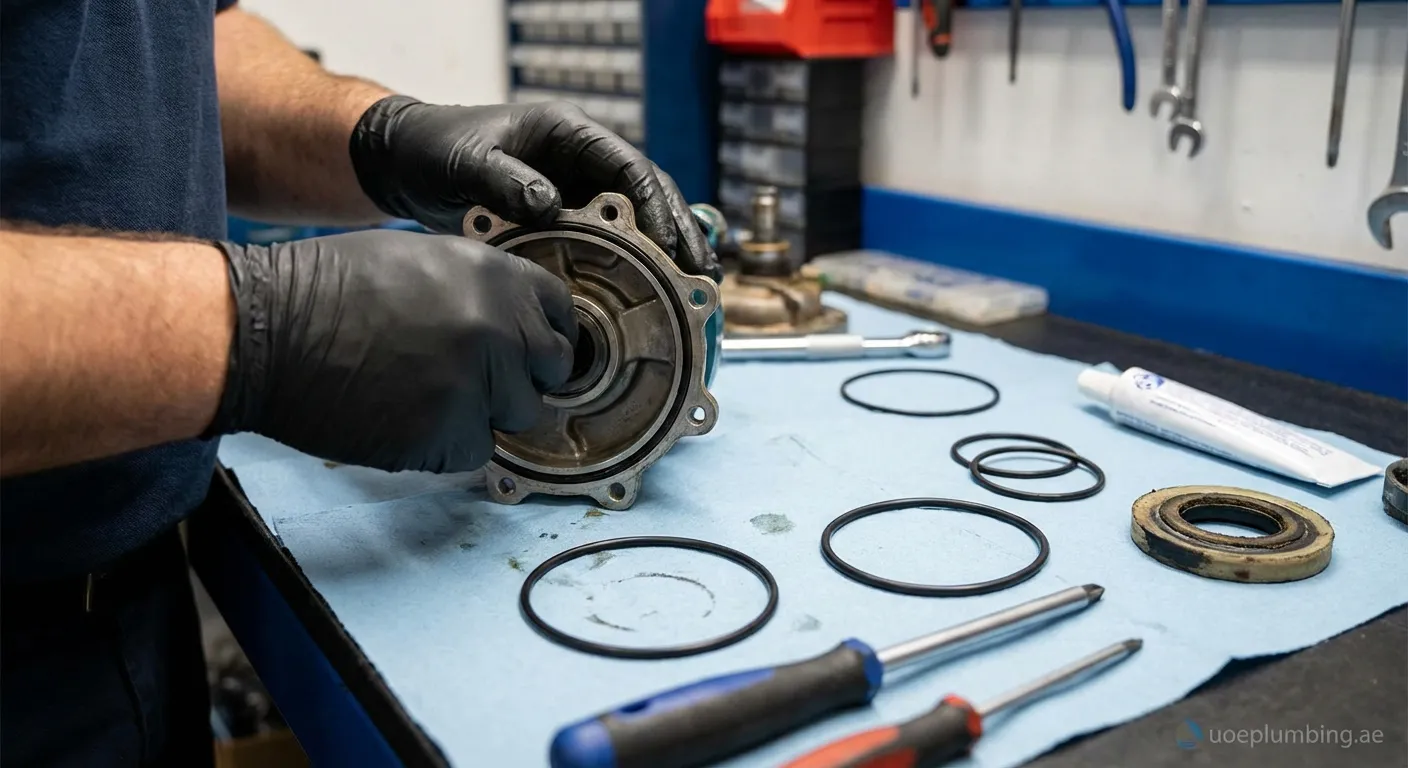
Tools Required
To successfully address the issue, gather the following tools:
- Seal pick set (soft-tipped preferred).
- Clean lint-free rags.
- Replacement seal kit (ensure correct size).
- Hydraulic fluid for lubrication.
- Wrenches for disassembling the cylinder gland.
Step-by-Step Guide: How to Fix a Leaking Buffer Seal
1. Safety and Preparation
Before you start any work, depressurize the system completely. Hydraulic fluid under pressure is dangerous. Lock out the equipment to prevent accidental startup. Clean the exterior of the cylinder to prevent dirt from entering the system once opened.
2. Disassemble the Cylinder
Carefully remove the cylinder head or gland. You will need to slide the rod out or remove the gland from the rod, depending on the design. Place the components on a clean workbench.
3. Remove the Old Seal
Locate the buffer seal inside the gland. Using your seal pick, carefully pierce or hook the old seal and pry it out. Be extremely careful not to scratch the metal groove surfaces. A scratch here allows fluid to bypass the new seal, rendering your effort to learn how to fix a leaking buffer seal useless.
4. Clean and Inspect
Wipe the groove thoroughly with a clean rag. Inspect the metal for burrs or wear. If the groove is damaged, simply replacing the seal won't fix the leak; the metal part may need machining or replacement.
5. Install the New Buffer Seal
Lubricate the new seal with fresh hydraulic fluid. Note the orientation! Most buffer seals are asymmetrical. The "lips" or the pressure-energized side must face the pressure source (inside the cylinder).
- Fold the seal into a kidney shape to fit it into the groove.
- Allow it to snap back into the groove.
- Use a smooth tool to iron out any kinks.
6. Reassembly
Lubricate the rod and the gland generously. Carefully slide the gland back onto the rod. Ensure the seal does not get pinched during this process. Tighten all bolts to the manufacturer's torque specifications.
Preventing Future Leaks
To avoid repeating this process soon, ensure your hydraulic fluid is clean and filtered. Contamination is the number one killer of seals. Regularly check for pressure spikes that might exceed the seal's rating. By following these steps on how to fix a leaking buffer seal, you ensure the longevity and reliability of your equipment.
Final Thoughts on Seal Repair
Replacing a worn seal restores efficiency and prevents damage. If the task seems too complex or you need urgent help, remember we have a service in Al Sinnayah Island. Contact our 24-7-plumber Al Sinnayah Island for professional assistance today.